A lot of people have been asking how to add their own interactive, home made, javascript Moodle activity.
Well here is how you can do it.
We are using Moodle 3.2 for this tutorial.
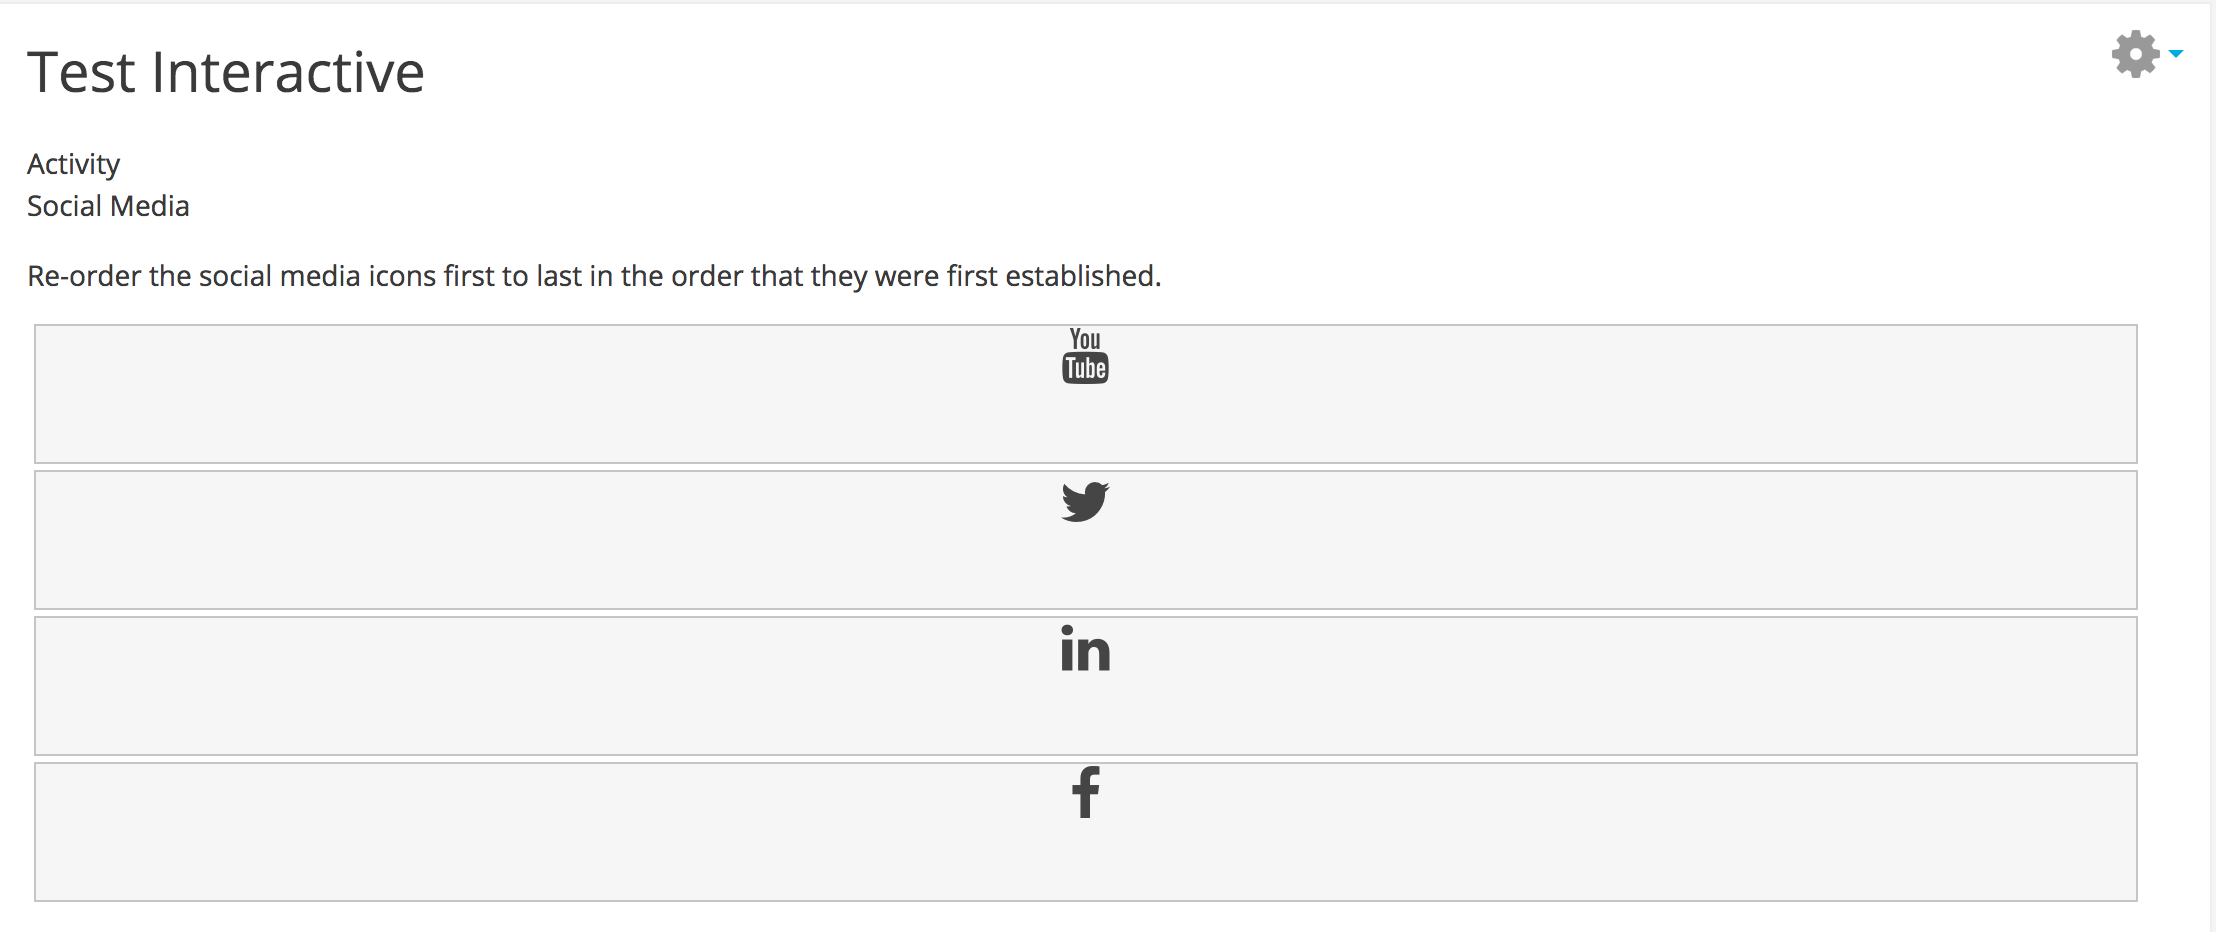
The activity you will add is a drag and drop, re-ordering activity that will provide feedback when the student re-orders the images correctly.
Step 1: Add scripts to your Moodle install
Here we will add JQuery, JQuery UI, JQuery UI-touch-punch and Font Awesome to your Moodle site.
Note: This requires administrator access to your Moodle install.
Select Site administration > Appearance > Additional HTML
Copy and paste the code below into additionalhtmlhead as show in the diagram below.
<<strong>script</strong> <strong>src</strong>="https://ajax.googleapis.com/ajax/libs/jquery/3.1.1/jquery.min.js"></<strong>script</strong>><<strong>link</strong> <strong>rel</strong>="stylesheet" <strong>href</strong>="https://ajax.googleapis.com/ajax/libs/jqueryui/1.12.1/themes/smoothness/jquery-ui.css"><<strong>script</strong> <strong>src</strong>="https://ajax.googleapis.com/ajax/libs/jqueryui/1.12.1/jquery-ui.min.js"></<strong>script</strong>><<strong>script</strong> <strong>src</strong>="https://cdnjs.cloudflare.com/ajax/libs/jqueryui-touch-punch/0.2.3/jquery.ui.touch-punch.min.js"></<strong>script</strong>><<strong>link</strong> <strong>rel</strong>="stylesheet" <strong>href</strong>="https://maxcdn.bootstrapcdn.com/font-awesome/4.7.0/css/font-awesome.min.css">Code language: JavaScript (javascript)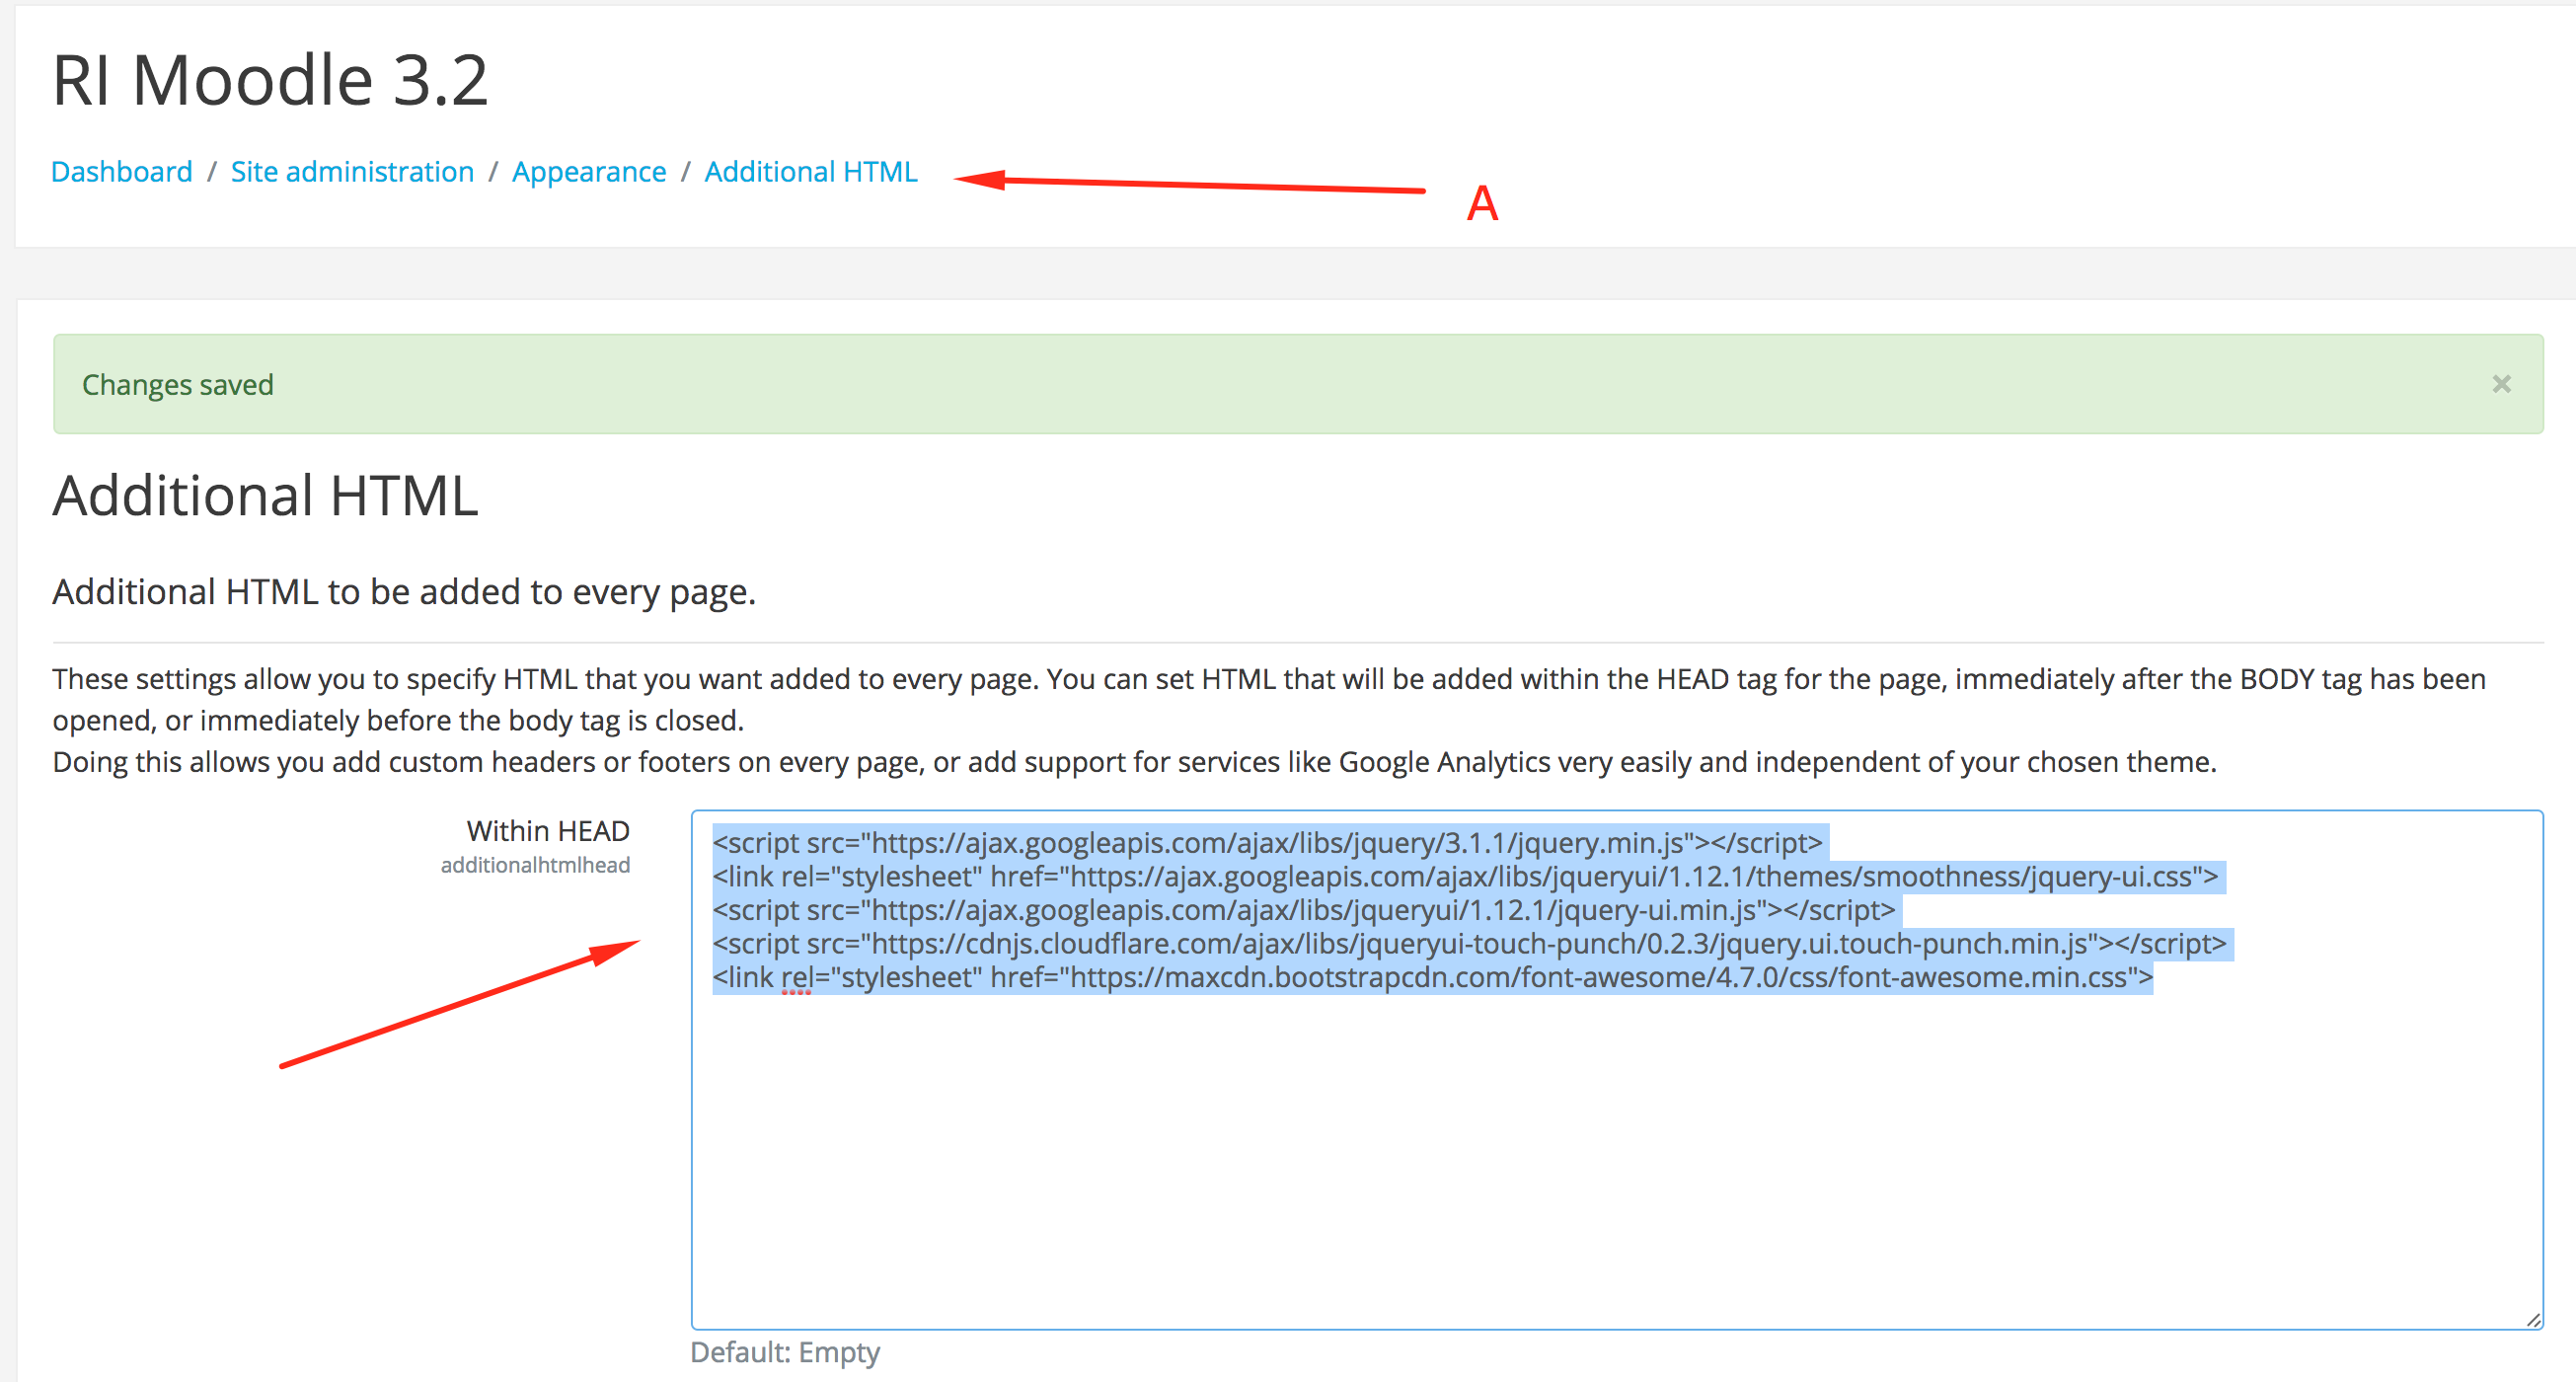
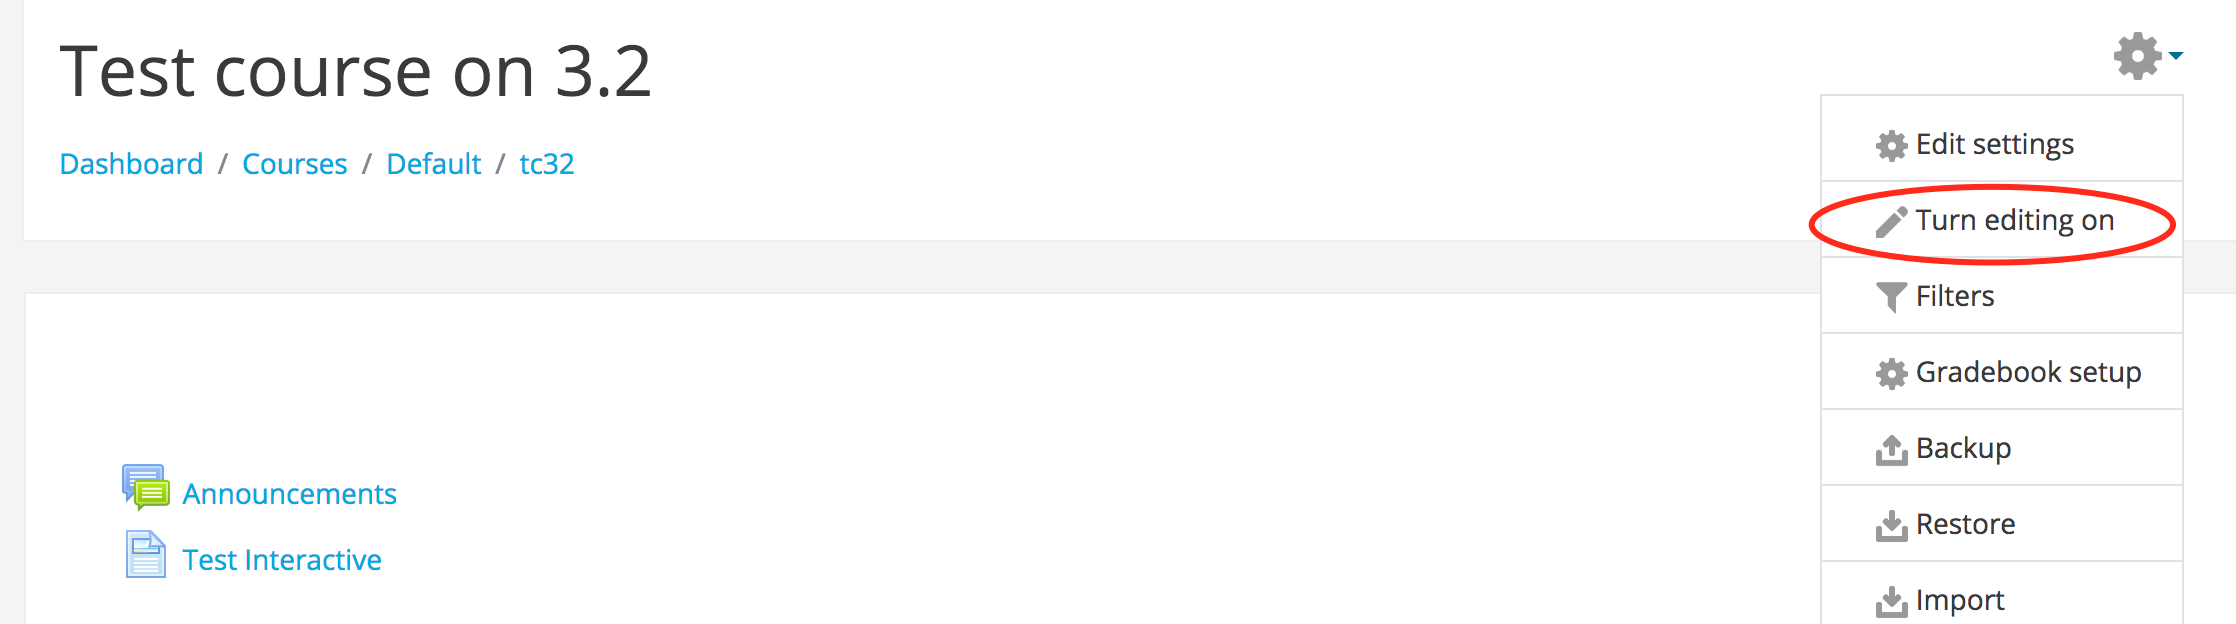
Step 2: Go to a course and turn on editing
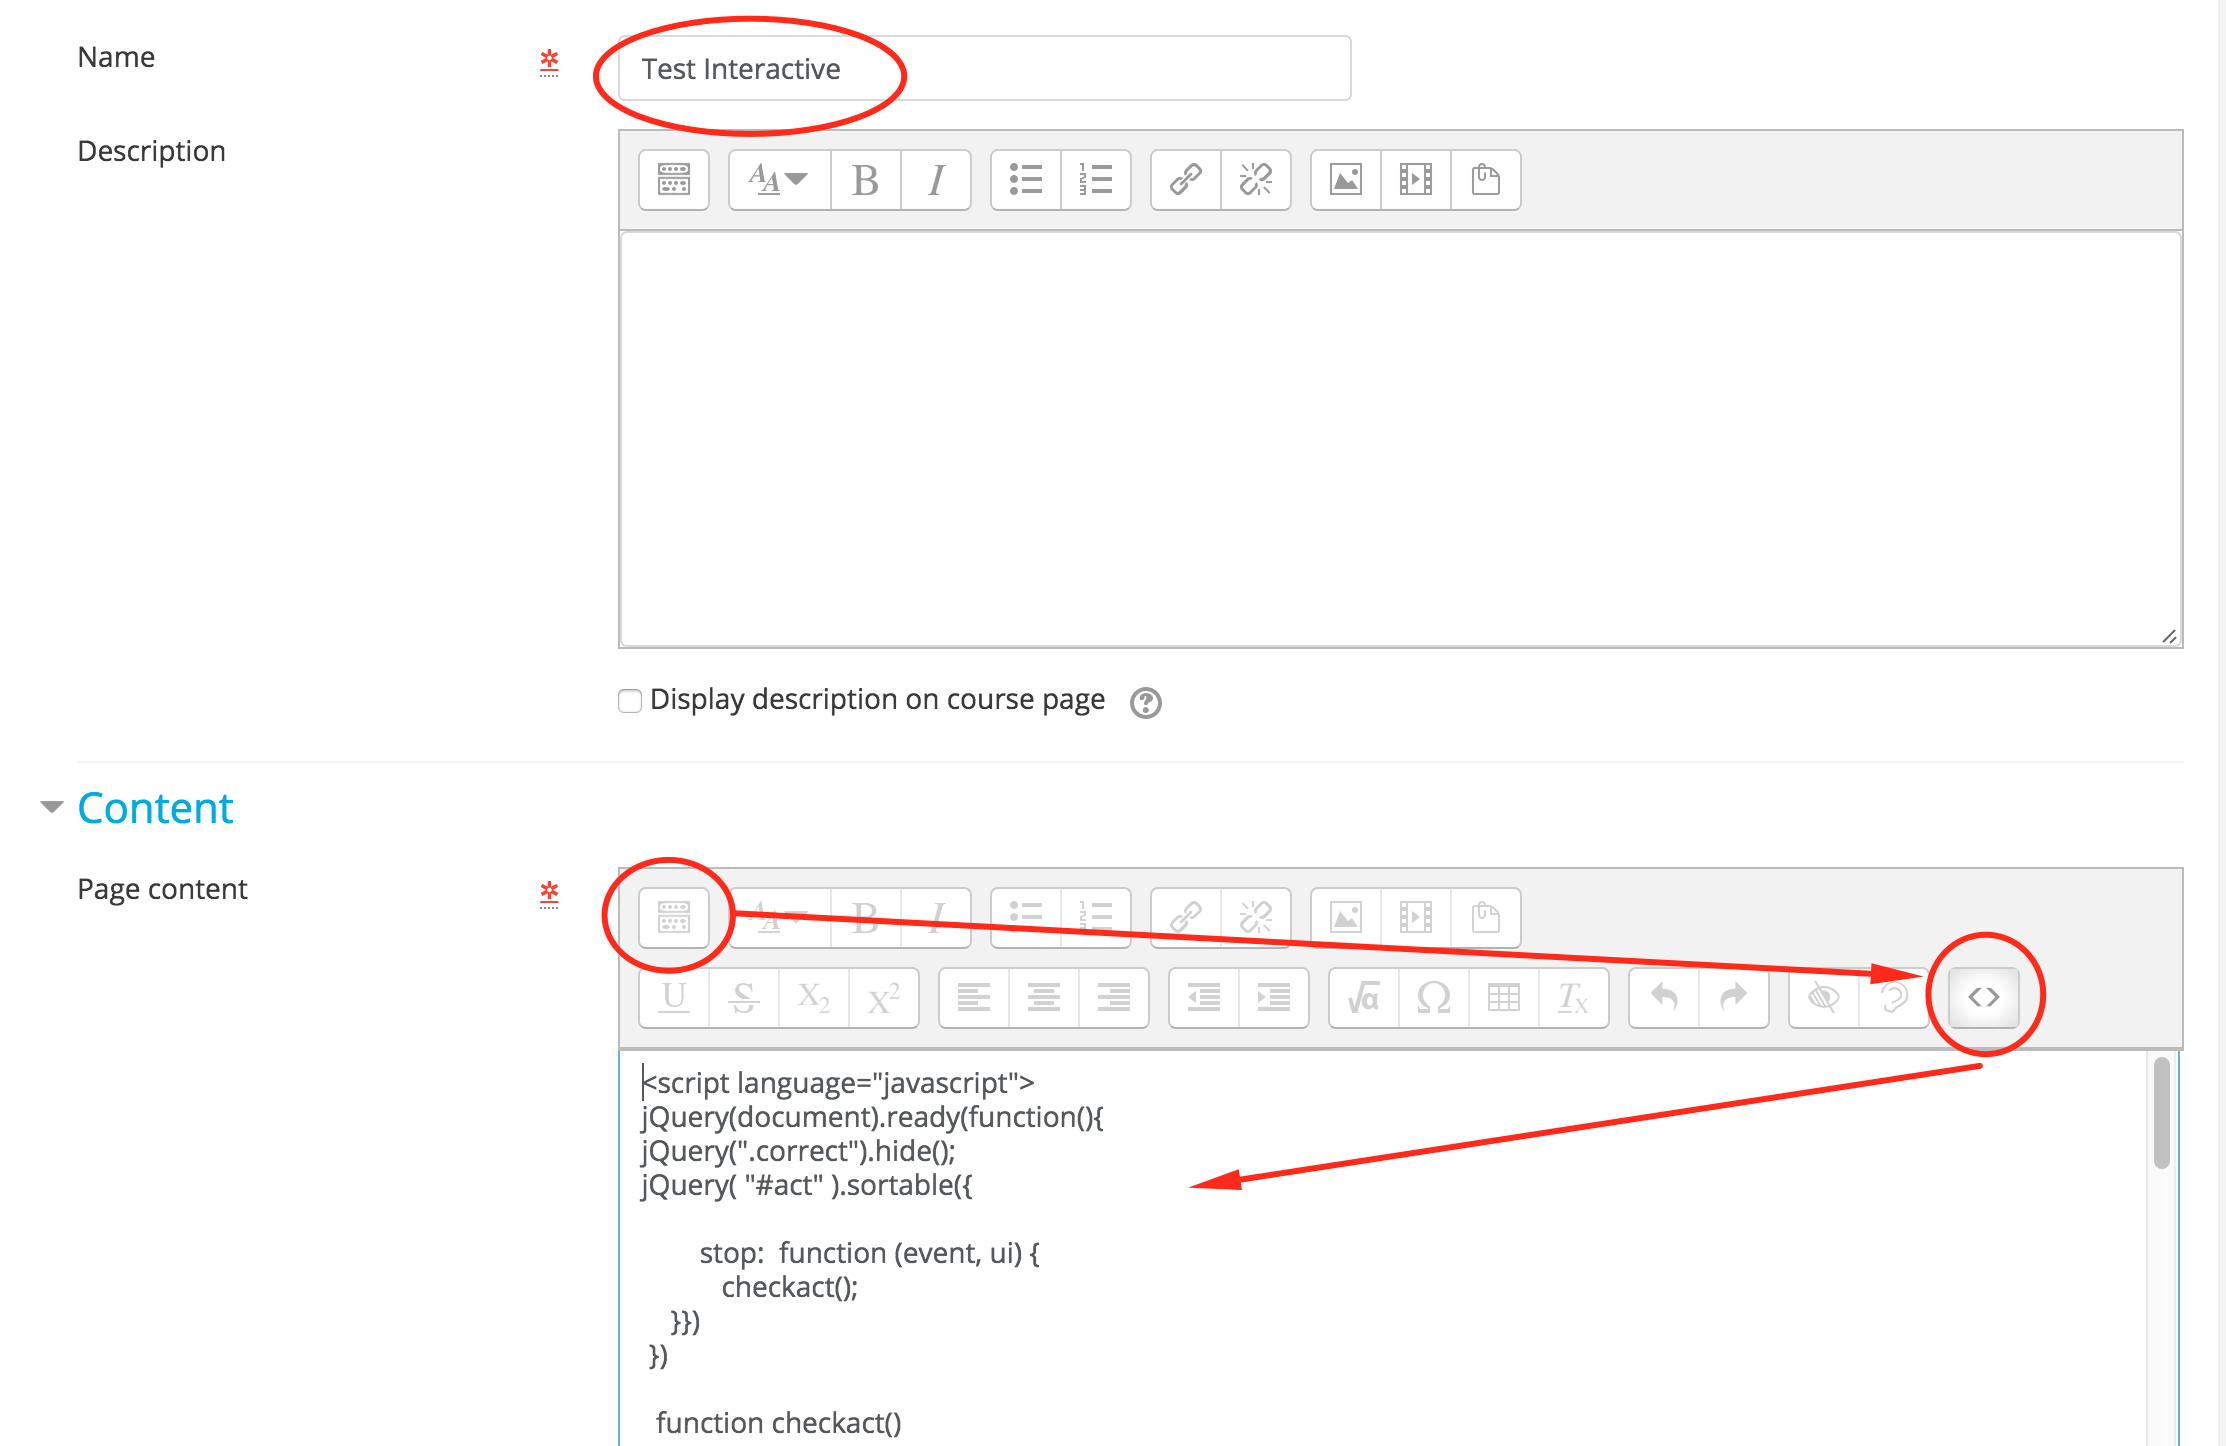
Step 3: Create a new page resource or edit an existing page resource

Step 4: Add the code below to the page content
- You will need to select the first icon in the page content menu as circled below.
- Then select the <> “code” icon on the right.
- Copy and paste the code below into the page content area as show in the image below.
Page content code
<<strong>script</strong> <strong>language</strong>="javascript">jQuery(document).ready(<strong>function</strong>(){jQuery(".correct").hide();jQuery( "#act" ).sortable({ stop: <strong>function</strong> (event, ui) { checkact(); }}) }) <strong>function</strong> <strong>checkact</strong>(){<strong>var</strong> items = jQuery('#act li'); <strong>if</strong>( jQuery(items[0]).attr('id') === "img3" && jQuery(items[1]).attr('id') === "img4" && jQuery(items[2]).attr('id') === "img1" && jQuery(items[3]).attr('id') === "img2" ) { jQuery(".correct").show(); } <strong>else</strong> {jQuery(".correct").hide();}}</<strong>script</strong>><<strong>div</strong> <strong>id</strong>="slide21"><<strong>div</strong> <strong>class</strong>="mh1">Activity</<strong>div</strong>><<strong>p</strong> <strong>class</strong>="ch2">Social Media</<strong>p</strong>><<strong>p</strong>>Re-order the social media icons first to last in the order that they were first established.</<strong>p</strong>><<strong>ul</strong> <strong>class</strong>="ui-sortable" <strong>id</strong>="act" <strong>style</strong>="list-style-type: none; margin: 0; padding: 0;"><<strong>li</strong> <strong>style</strong>=" margin: 3px 3px 3px 3px; padding: 1px; width: 98%; height: 70px; border: 1px solid #c5c5c5; background: #f6f6f6; font-weight: normal; color: #454545; text-align: center;" <strong>class</strong>="ui-state-default img1" <strong>id</strong>="img1"><<strong>i</strong> <strong>class</strong>="fa fa-youtube fa-2x" <strong>title</strong>="Youtube"></<strong>i</strong>><<strong>div</strong> <strong>class</strong>="correct">2005</<strong>div</strong>></<strong>li</strong>><<strong>li</strong> <strong>style</strong>=" margin: 3px 3px 3px 3px; padding: 1px; width: 98%; height: 70px; border: 1px solid #c5c5c5; background: #f6f6f6; font-weight: normal; color: #454545; text-align: center;" <strong>class</strong>="ui-state-default img2 list-group-item" <strong>id</strong>="img2"><<strong>i</strong> <strong>class</strong>="fa fa-twitter fa-2x" <strong>title</strong>="Twitter"></<strong>i</strong>><<strong>div</strong> <strong>class</strong>="correct">2006</<strong>div</strong>></<strong>li</strong>><<strong>li</strong> <strong>style</strong>=" margin: 3px 3px 3px 3px; padding: 1px; width: 98%; height: 70px; border: 1px solid #c5c5c5; background: #f6f6f6; font-weight: normal; color: #454545; text-align: center;" <strong>class</strong>="ui-state-default img3 list-group-item" <strong>id</strong>="img3"><<strong>i</strong> <strong>class</strong>="fa fa-linkedin fa-2x" <strong>title</strong>="LinkedIn"></<strong>i</strong>><<strong>div</strong> <strong>class</strong>="correct">2003</<strong>div</strong>></<strong>li</strong>><<strong>li</strong> <strong>style</strong>=" margin: 3px 3px 3px 3px; padding: 1px; width: 98%; height: 70px; border: 1px solid #c5c5c5; background: #f6f6f6; font-weight: normal; color: #454545; text-align: center;" <strong>class</strong>="ui-state-default img4 " <strong>id</strong>="img4"><<strong>i</strong> <strong>class</strong>="fa fa-facebook fa-2x" <strong>title</strong>="Facebook"></<strong>i</strong>><<strong>div</strong> <strong>class</strong>="row correct">2004</<strong>div</strong>></<strong>li</strong>></<strong>ul</strong>><<strong>div</strong> <strong>class</strong>="alert alert-success correct">Correct</<strong>div</strong>></<strong>div</strong>>Code language: JavaScript (javascript)Step 5: Save
Click “Save and display” at the bottom of the page.
Step 6: Test your activity
If everything has been added correctly, you should now be able to test the re-order activity by clicking and dragging the items into the right order.
Because we added the jqueryui-touch-punch script, this will also work on a mobile device.
If you would like me to create a detailed course on “how to create your own Moodle activities using JavaScript” please contact me on LinkedIn https://www.linkedin.com/in/chrisrichterin/ or comment below.
The image below is an example of how your interactive drag and drop activity should look.