The story was that we wanted some live video footage and reasonably good audio for some people that wanted to hear our music.
We wanted to keep it really simple and didn’t have a lot of time to edit video and mix down the audio.
This is how it came out (use headphones or decent speakers)……
The venue was an amazing little place called ‘The Nourish Bar’ that served everything healthy and a little alternative. Suited us perfectly.
It had to be recording in one morning and uploaded on YouTube 2 days later, we were up for the challenge.
Sure, no problem.
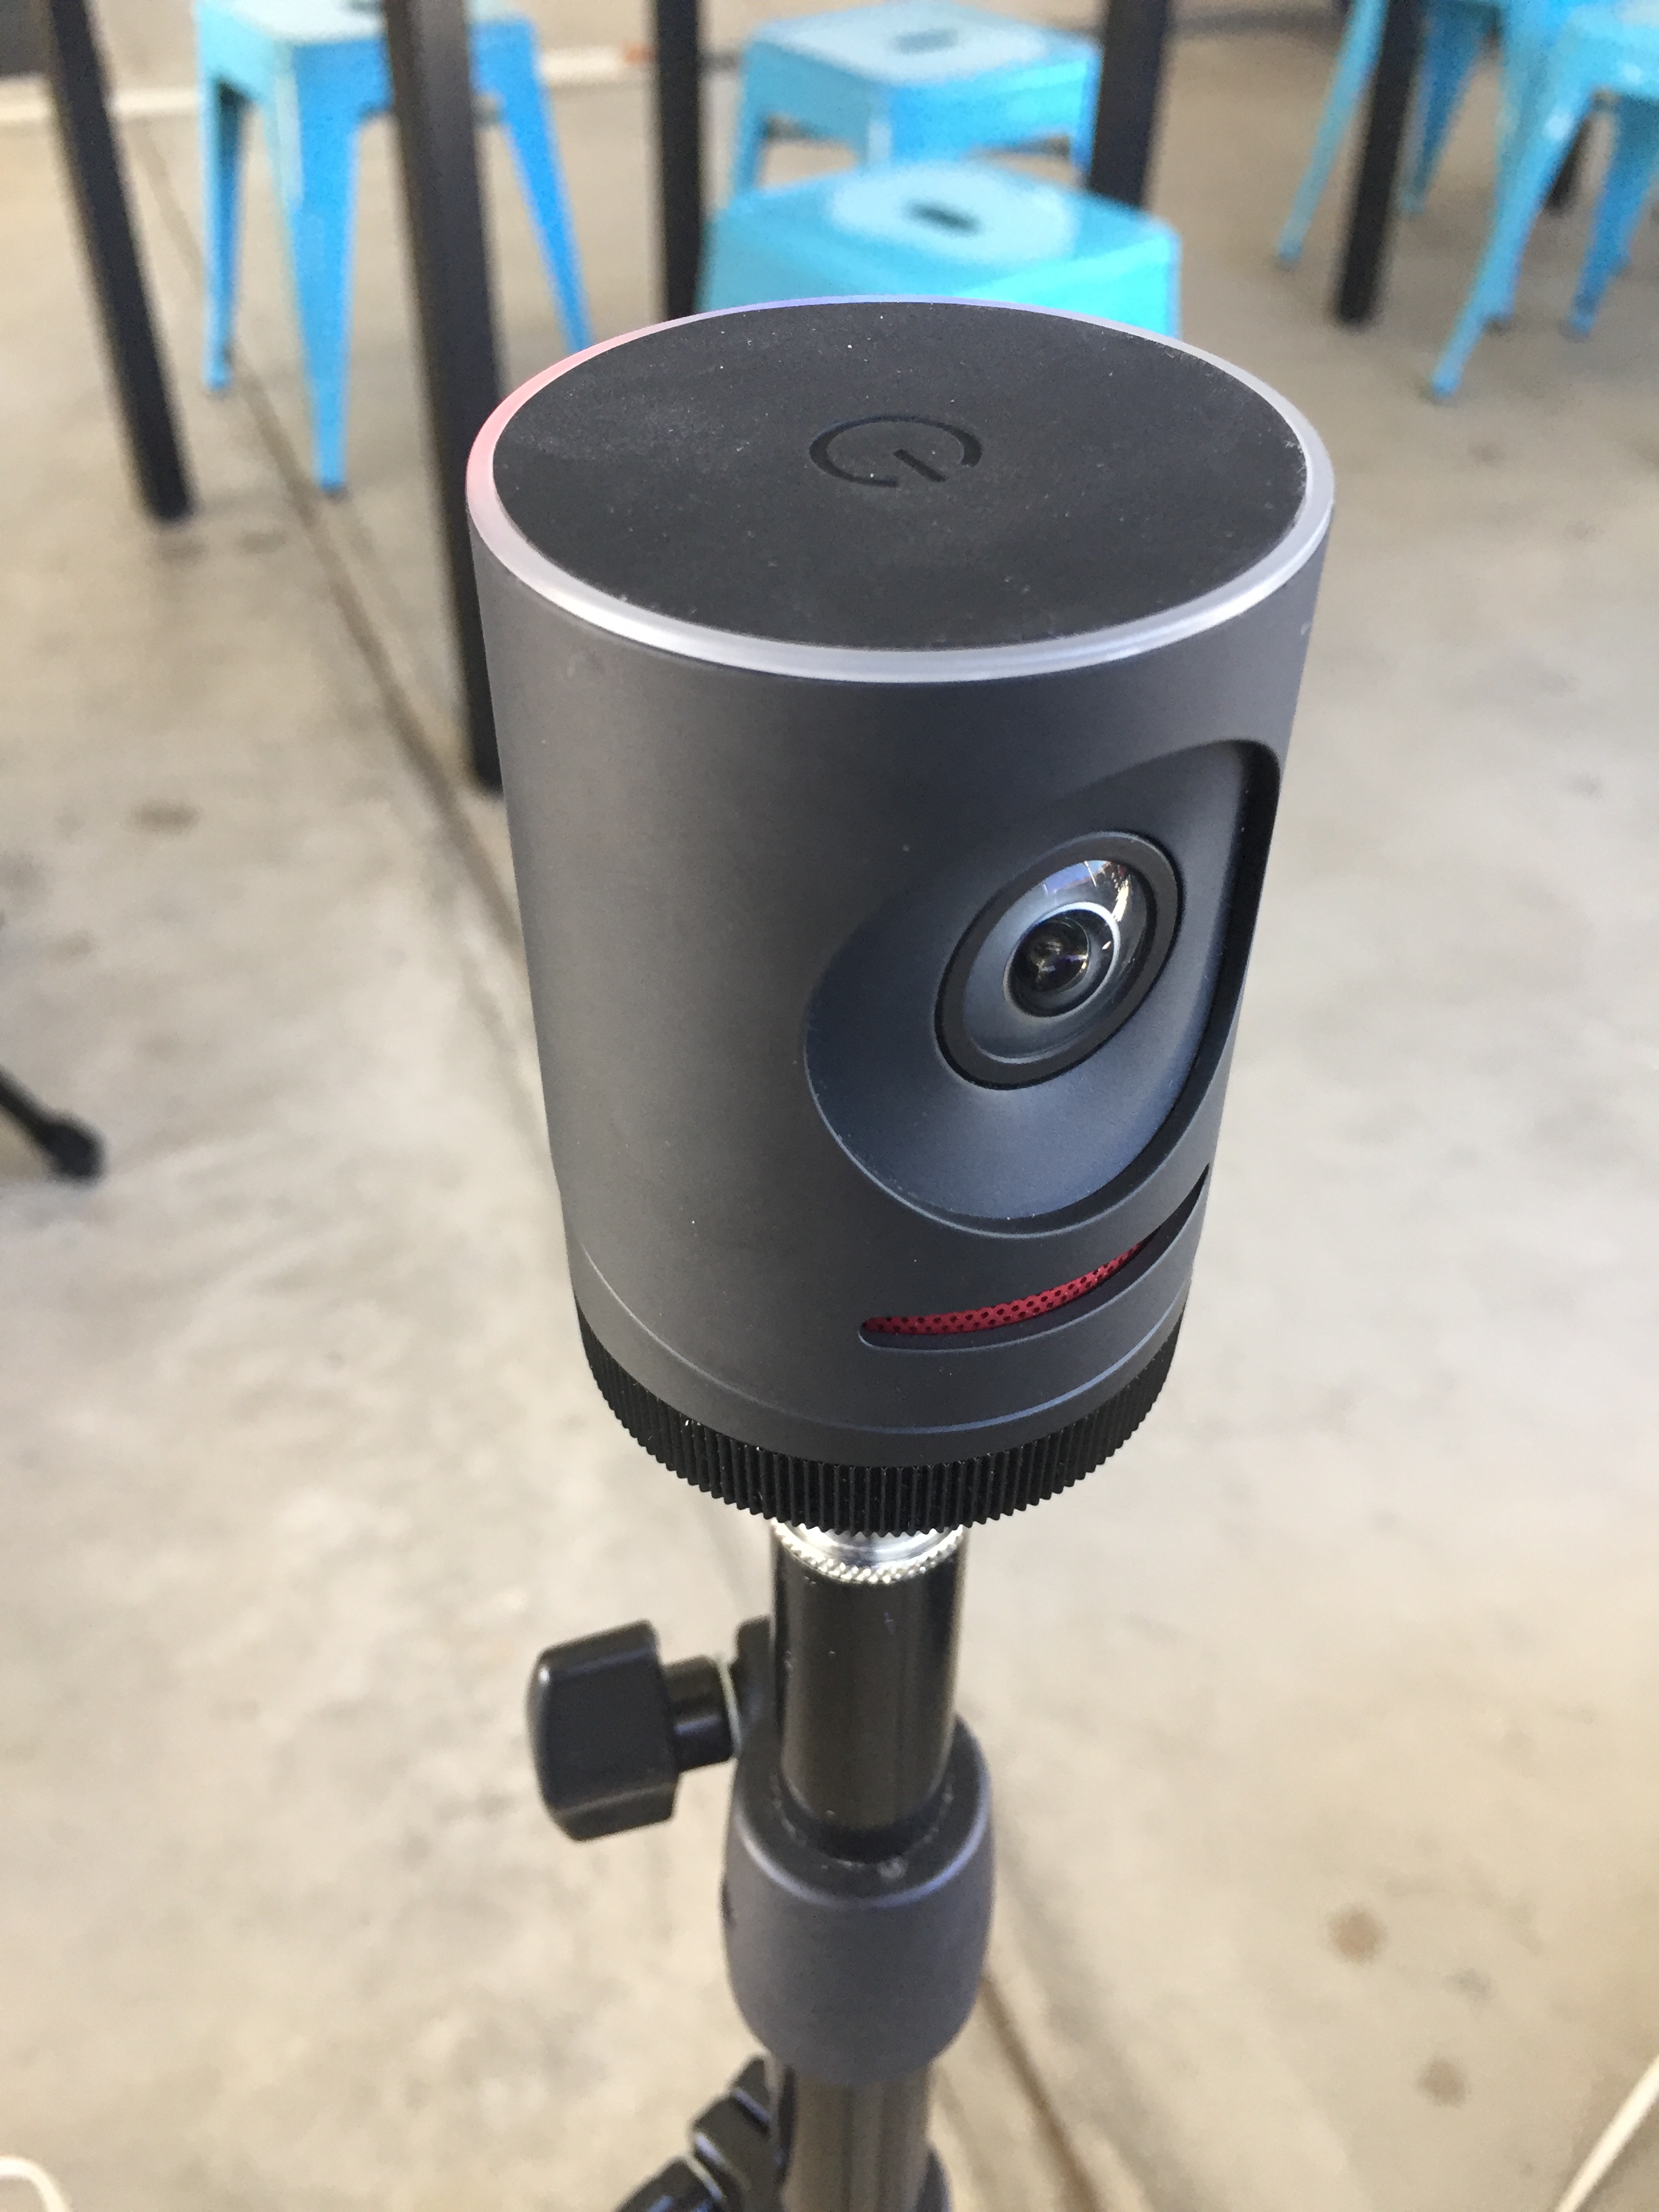
We had a Mevo camera that hadn’t been tested yet, so we thought this would be the prefect opportunity to try it out.
The band consisted of:
- Bass player
- Djembe
- Stomp box
- Acoustic guitar
- Piano
- 2 Vocals
The PA:
- QSC KSub – 1000W powered 2×12′ speakers
- SQC K12 1000w 12′ powered speaker
- Behringer mixer 1202fx
- Mevo camera
Recording
- Presonus 44vi recording interface
- Macbook Pro
- Logic X software on Mac
- Final Cut Pro (to remix audio with video and send to YouTube)
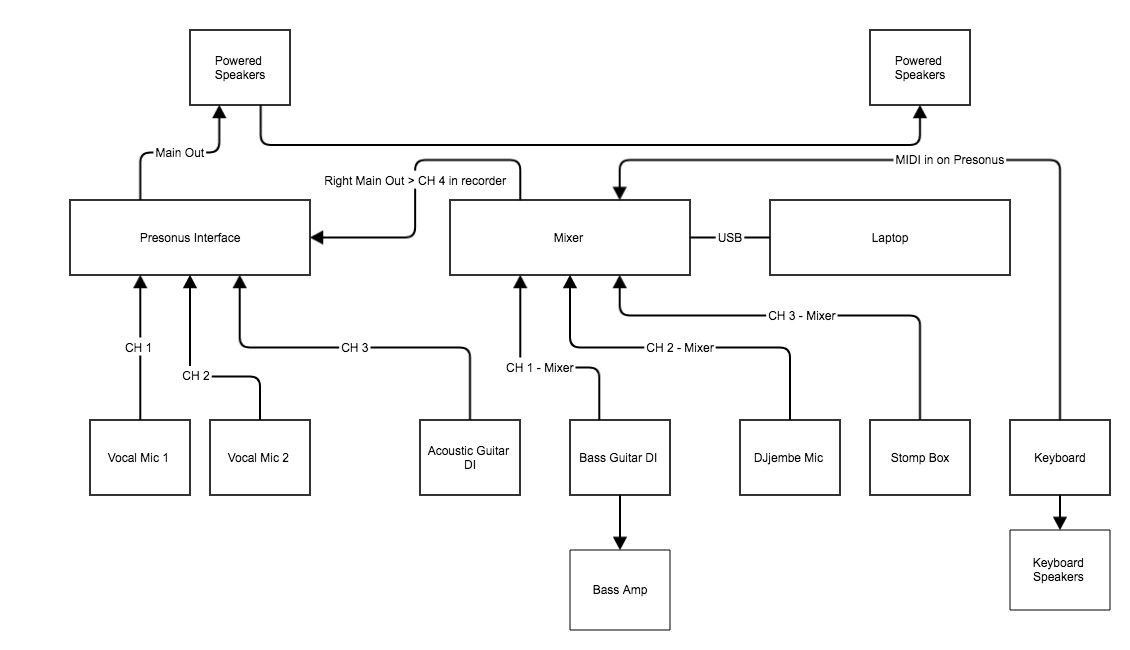
Because we only had a small four channel recorder, we had to be very creative in how we recorded the channels.

Presonus interface
- CH 2 and CH 2: Vocals were sent direct to the Presonus interface.
- CH 1: Acoustic Guitar direct to Presonus interface.
- CH 4: A sub mix of the bass, djembe and stomp from the Behringer mixer
- MIDI: Keyboard sent to midi input on Presonus interface
Behringer Mixer
- Ch 1: Djembe Microphone (SM58)
- Ch 2: Stomp Box (Bigfoot)
- Ch 3: Bass Guitar
The left main on the Behringer mixer was then sent to Ch 4 on the Presonus interface.
We setup the Mevo camera extremely close to the band.
What do you do with a Mevo? Connect your mobile phone to the device using it’s internal wifi, then once connected you can control the operation of the device and look at what is being recorded on your phone. The Mevo records to a memory card in the device.
I put the Mevo on a setting that automatically detects faces and hit record. The Mevo camera is very clever, it automatically picks up any movement in the band, zooms in and out to make its own custom edit. When completed I just use the final pre-edited video footage, it’s not 100% perfect but it saved a lot of time.
We recorded the Mevo video and its internal audio as well as recording to the Mac Book Pro.
Both devices were left to record the full set (about 4o minutes) then we stopped and saved the recording.
NOTE: One thing to be really careful of – don’t accidentally smudge the camera lens on the Mevo. It is really easy to do.
Mix down
Once we had recorded everything, I took the audio and video back home.
Did a quick mix down on Logic Pro X of all the audio that I had recorded and chose a sound for the midi piano.
Bounced the stereo track from Logic Pro X down as a WAV file.
I then imported the video onto the laptop into Final Cut Pro and then added the audio file from Logic Pro X.
The difficult and time consuming part was lining up the audio and video tracks. By using the Mevo/Video audio and the Logic audio I could find peaks that stood out and line up the audio really well.
Finally, in Final Cut Pro, I mixed a small amount of live Mevo audio with the Logic mixed audio to give it more ambience so that it ‘felt’ more live and had some noise from the audience in the background.
Then each of the songs were then exported directly to Youtube.
The video below is the result of the recording setup.
One thing we didn’t do while recording this time was to have it streamed live from the Mevo on FaceBook. We will definitely do that next time.
I hope this has been helpful…. Thanks for reading.
Feel free to ask any questions. Always happy to help out.


